

- Pinecone searches through data in milliseconds. Metadata filters and support for sparse-dense vectors in a single index improve relevance, so results are quick, accurate, and grounded across diverse search tasks.
- You can start for free on the Starter plan and scale usage with transparent usage-based pricing. Add or remove resources to meet your desired capacity and performance, upwards of billions of embeddings.
- You can launch, use, and scale your AI solution without maintaining infrastructure, monitoring services, or troubleshooting algorithms. Pinecone meets the security and operational requirements of enterprises.
Agents for Amazon Bedrock
In Bedrock, users interact with agents, which combine the natural language interface of the supported LLMs with that of a knowledge base. Bedrock’s Knowledge Base feature uses the supported LLMs to generate embeddings from the original data source. These embeddings are stored in Pinecone, and Bedrock uses the Pinecone index to retrieve semantically relevant content when a user queries the agent.The LLM used for embeddings can be different from the one used for natural language generation. For example, you can use Amazon Titan to generate embeddings and Anthropic’s Claude to generate natural language responses.
Knowledge Bases for Amazon Bedrock
A Bedrock knowledge base ingests raw text data or documents found in Amazon S3, embeds the content, and upserts the embeddings into Pinecone. Then, a Bedrock agent can interact with the knowledge base to retrieve the most semantically relevant content for a user’s query. The Knowledge Base feature helps you improve your AI models’ performance. With Bedrock’s LLMs and Pinecone, you can integrate your data from AWS storage solutions and improve the accuracy and relevance of your AI models. This guide walks through creating a Knowledge Base for Amazon Bedrock and an agent that retrieves information from it.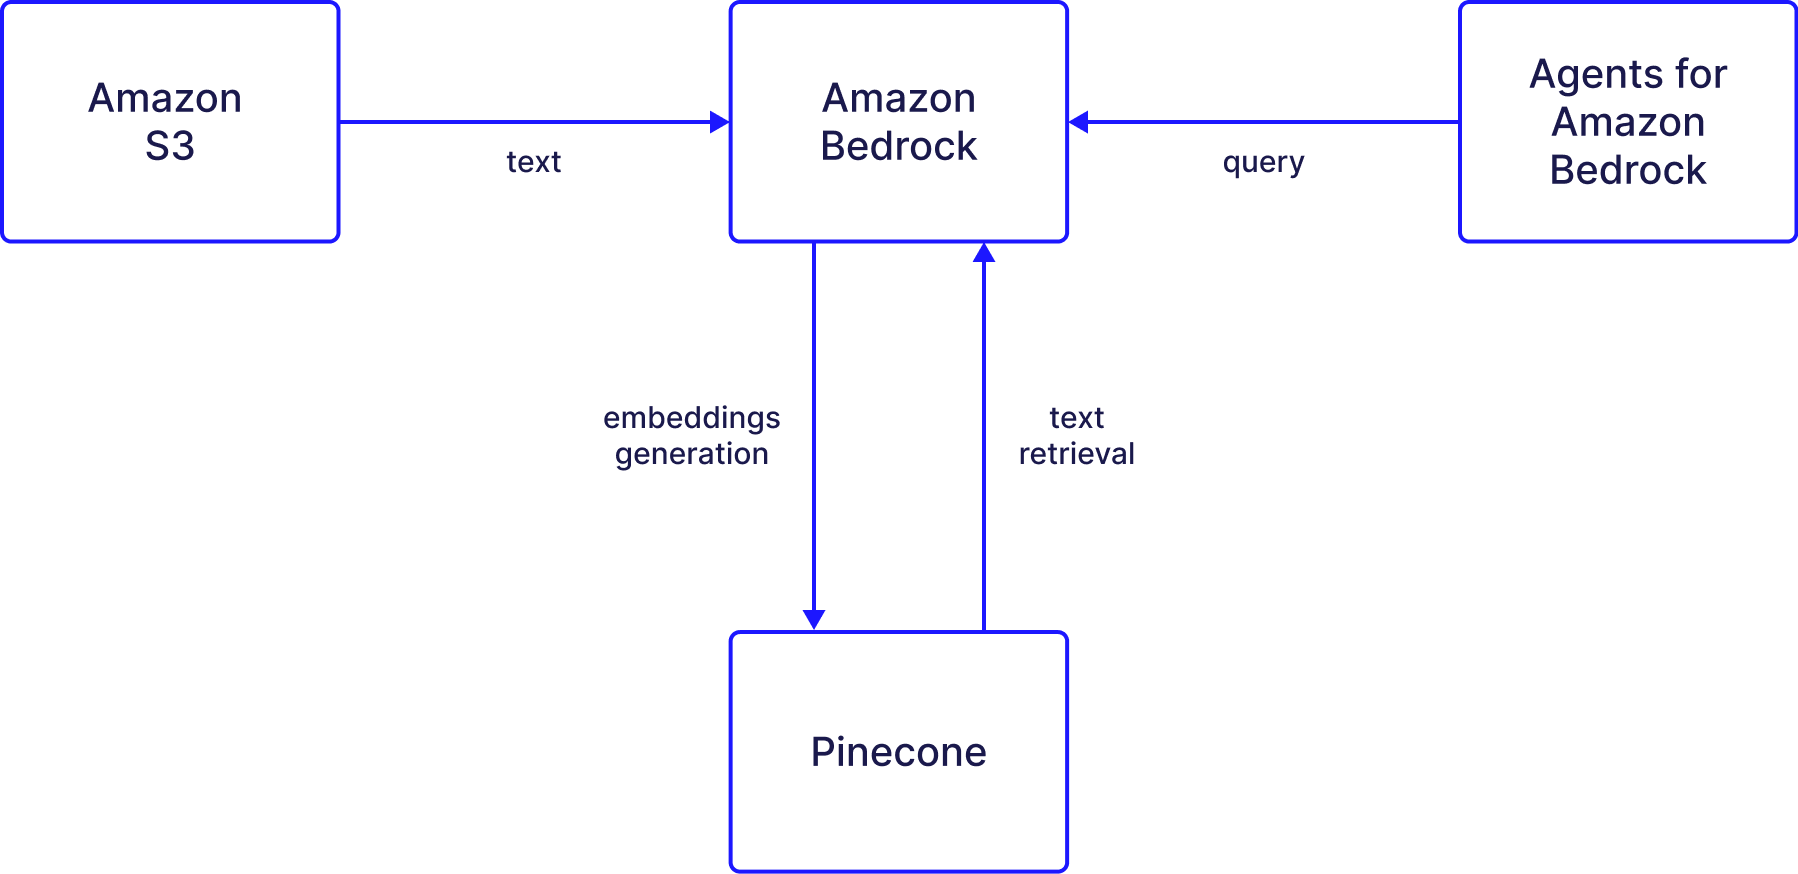
Setup guide
Create a Pinecone index
The knowledge base stores data in a Pinecone index. Decide which supported embedding model to use with Bedrock before you create the index, because your index’s dimensions must match the model’s. For example, the AWS Titan Text Embeddings V2 model can use dimension sizes 1024, 384, and 256.After you sign up for Pinecone, follow the quickstart guide to create your Pinecone index and retrieve your
apiKey and index host from the Pinecone console.Your index must have the same dimensions as the model you’ll later select for creating your embeddings. Also, your index must be empty. All data must be ingested through Bedrock’s sync process.
Set up your data source
Set up secrets
After you set up your Pinecone index, create a secret in AWS Secrets Manager:- In the Secret type section, select Other type of secret.
- In the Key/value pairs section, enter a key-value pair for the Pinecone API key name and its respective value. For example, use
apiKeyand the API key value.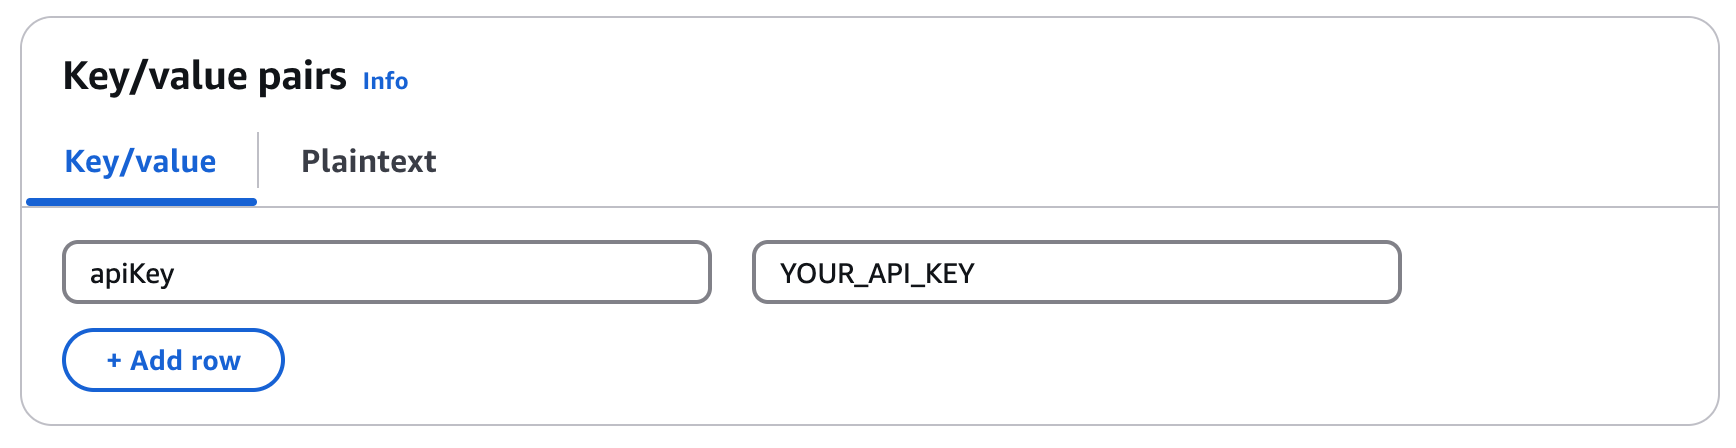
- Click Next.
- Enter a Secret name and Description.
- Click Next to save your key.
- On the Configure rotation page, select all the default options in the next screen, and click Next.
- Click Store.
- Click the new secret you created and save the secret ARN for a later step.
Set up S3
The knowledge base draws on data saved in S3. This example uses a sample of research papers obtained from a dataset. Bedrock embeds this data and then saves it in Pinecone. Follow these steps to set up S3:- Create a new general purpose bucket in Amazon S3.
-
After the bucket is created, upload a CSV file.
The CSV file must have a field for text that will be embedded, and a field for metadata to upload with each embedded text.
-
Save your bucket’s address (
s3://…) for the following configuration steps.
Create a Bedrock knowledge base
To create a Bedrock knowledge base, use the following steps:
- Enter a Knowledge Base name.
- In the Choose data source section, select Amazon S3.
- Click Next.
- On the Configure data source page, enter the S3 URI for the bucket you created.
- If you don’t want to use the default chunking strategy, select a chunking strategy.
- Click Next.
Connect Pinecone to the knowledge base
Next, select an embedding model to configure with Bedrock, and configure the data sources:
- Select the embedding model you decided on earlier.
- For the Vector database, select Choose a vector store you have created and select Pinecone.
-
Select the checkbox that authorizes AWS to access your Pinecone index.
Ensure your Pinecone index is empty before proceeding. Bedrock can’t work with indexes that contain existing data. All data must be ingested through Bedrock’s sync process.
- For the Endpoint URL, enter the Pinecone index host retrieved from the Pinecone console.
- For the Credentials secret ARN, enter the secret ARN you created earlier.
-
In the Metadata field mapping section, enter the Text field name you want to embed and the Bedrock-managed metadata field name that Bedrock uses for metadata it manages (e.g.,
metadata). - Click Next.
- Review your selections and complete the creation of the knowledge base.
- On the Knowledge Bases page, select the knowledge base you just created to view its details.
-
Click Sync for the newly created data source.
Whenever you add new data, sync the data source to start the ingestion workflow, which converts your Amazon S3 data into vector embeddings and upserts them into your Pinecone index. Depending on the amount of data, this can take some time.
Create and link an agent to Bedrock
Lastly, create an agent that will use the knowledge base for retrieval: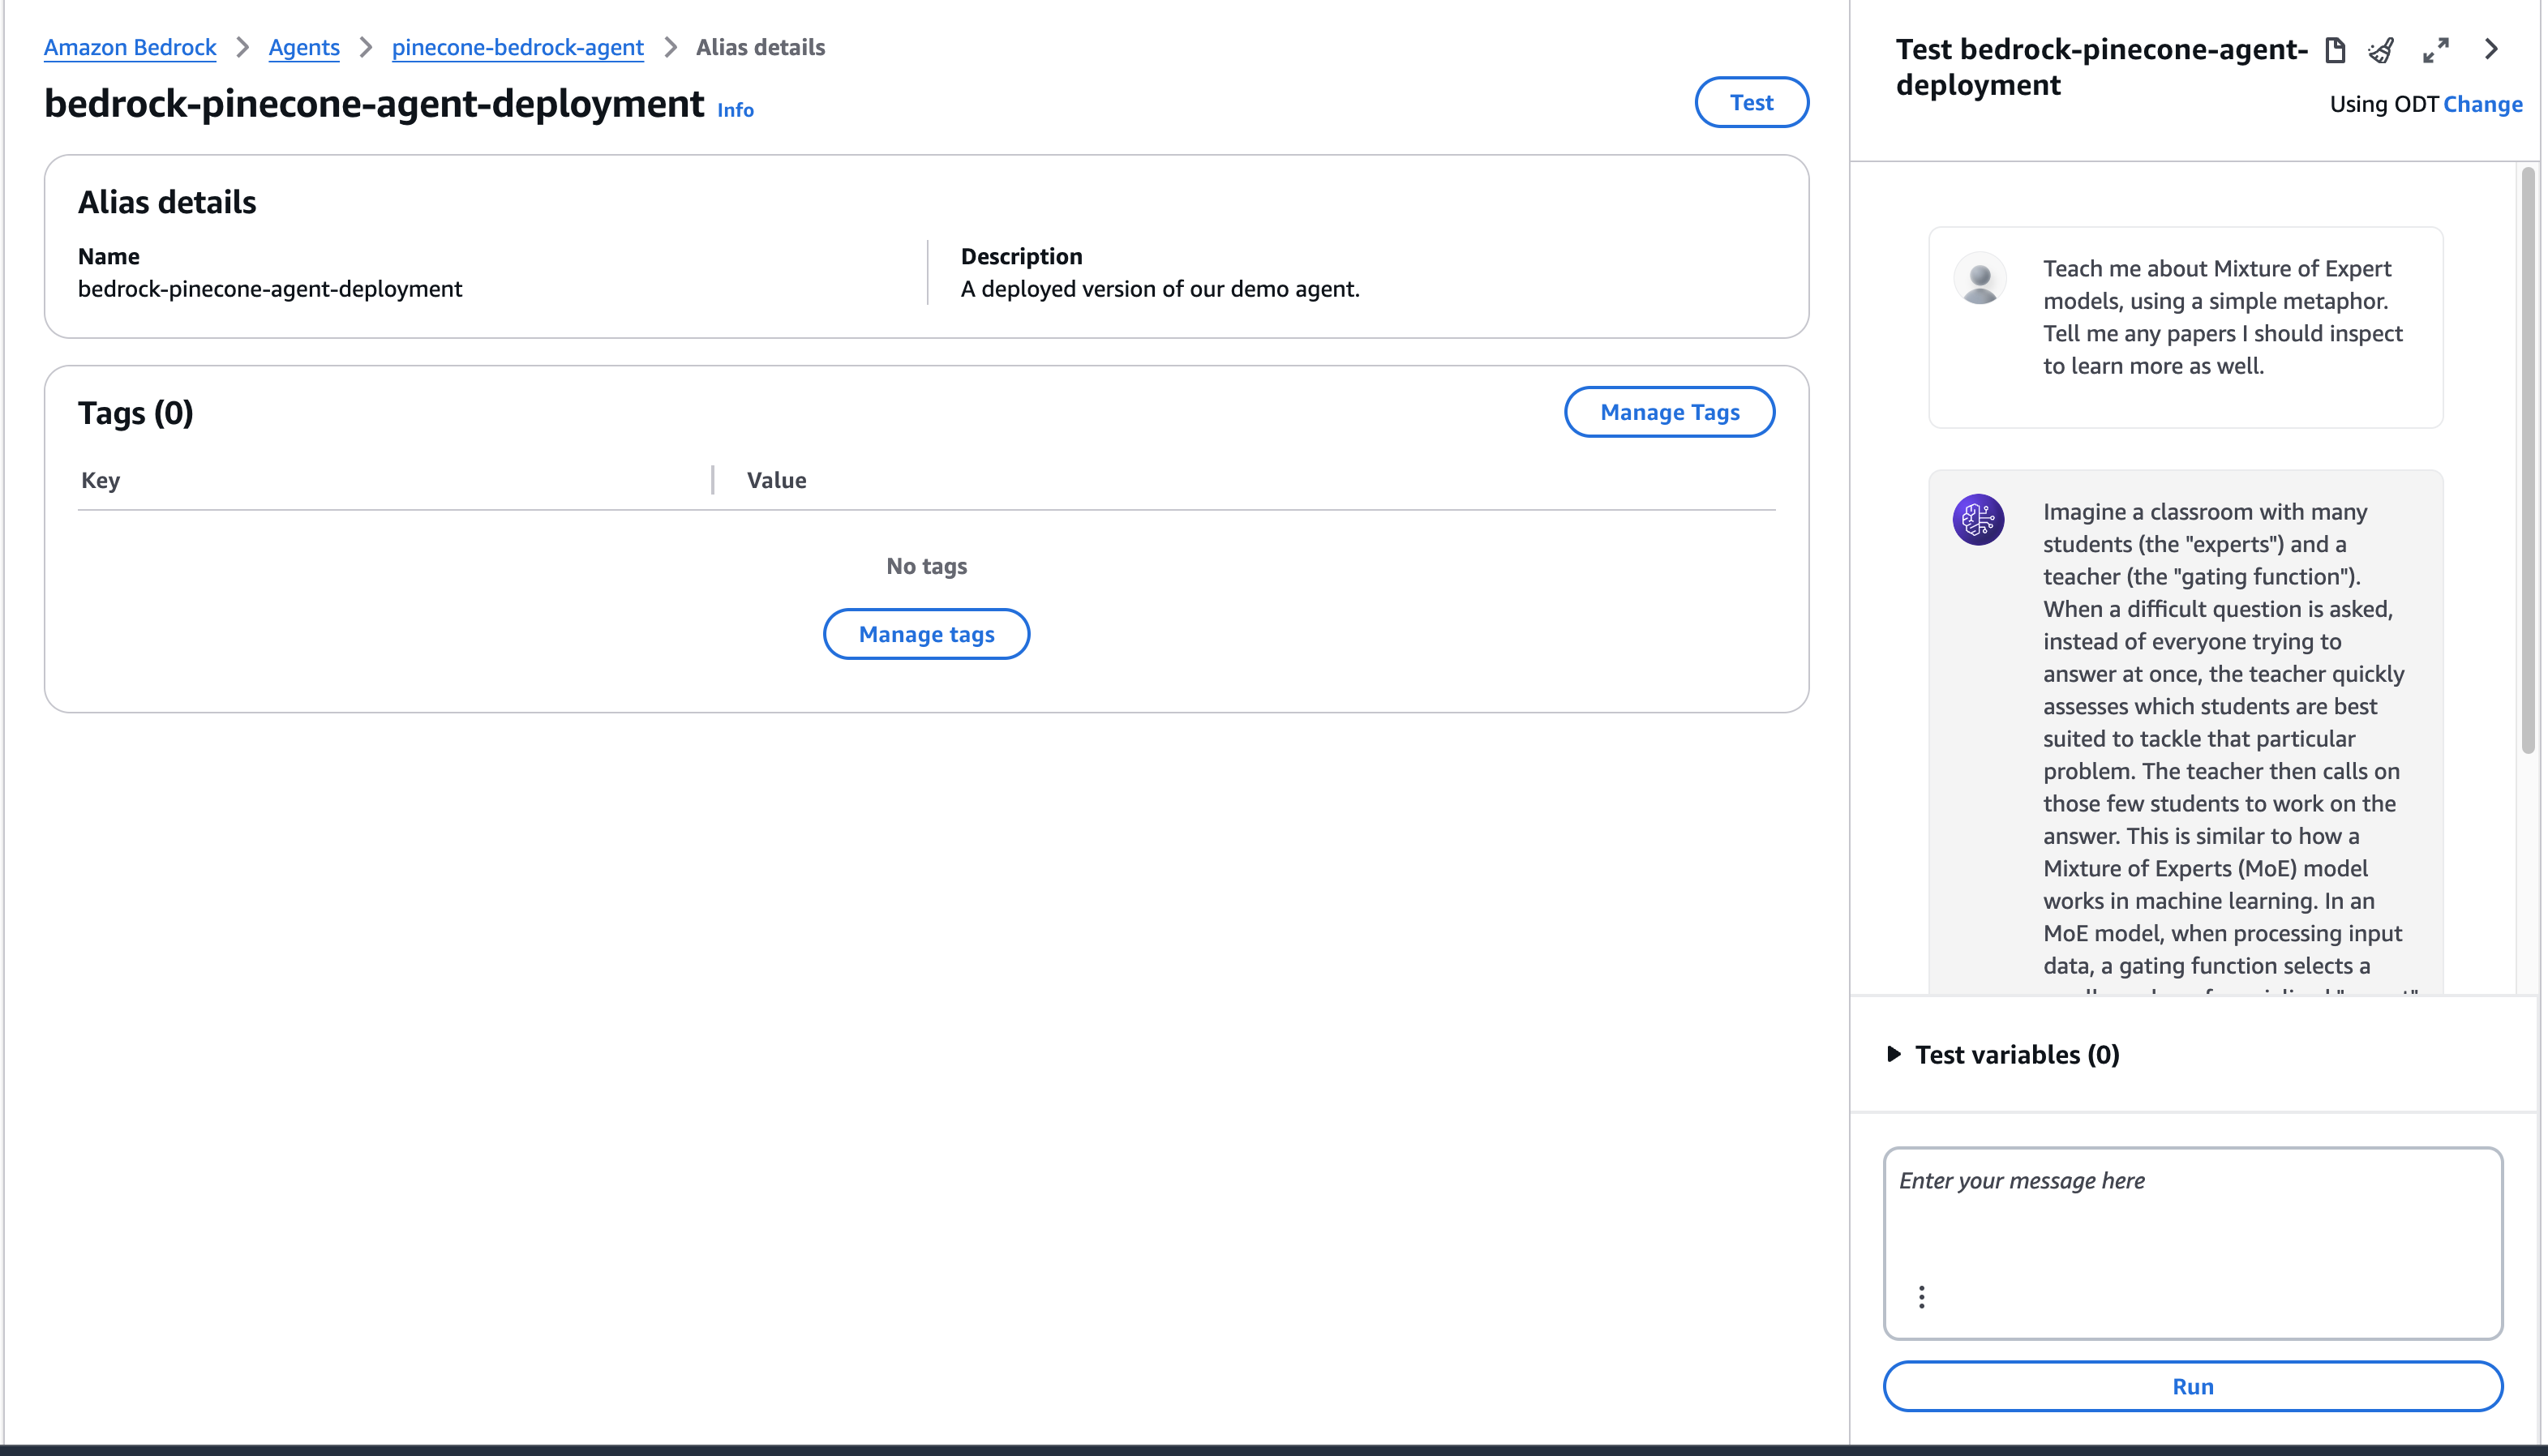
- Click Create Agent.
- Enter a Name and Description.
- Click Create.
- Select the LLM provider and model you’d like to use.
- Provide instructions for the agent. These define what the agent is trying to accomplish.
- In the Knowledge Bases section, select the knowledge base you created.
- Prepare the agent by clicking Prepare near the top of the builder page.
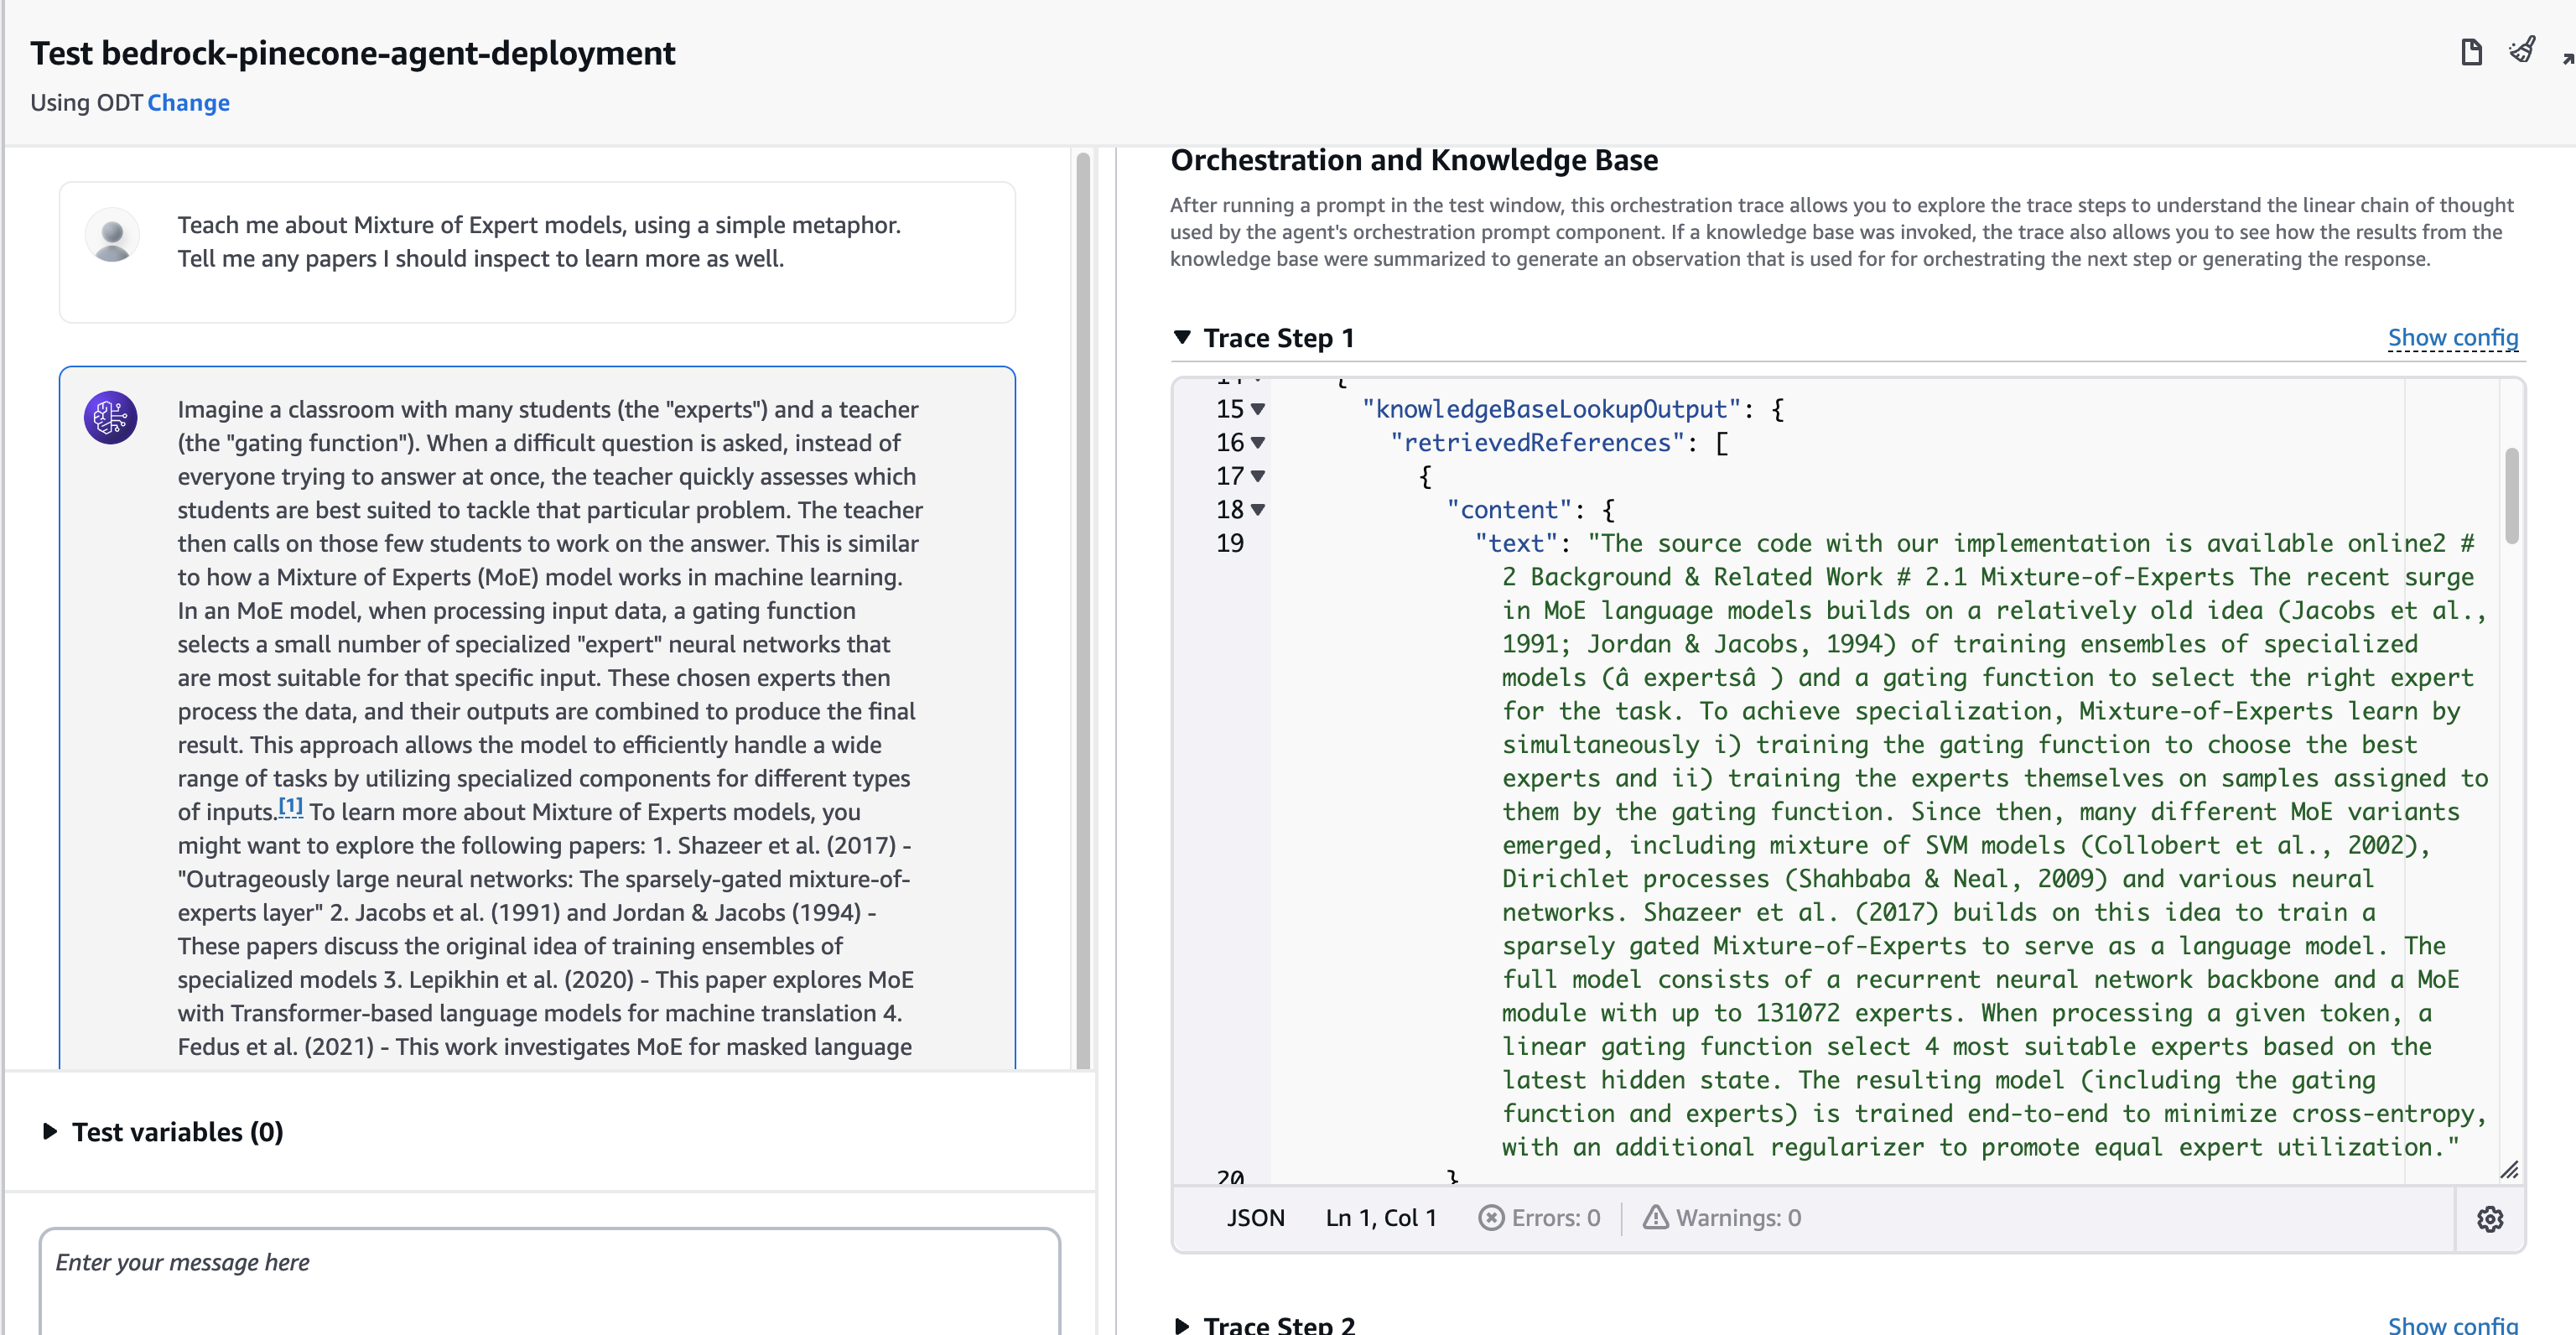
- Test the agent after preparing it to verify it’s using the knowledge base.
- Click Save and exit.
Create an alias for your agent
To deploy the agent, create an alias for it that points to a specific version of the agent. After you create the alias, it appears in the agent view.- On the Agents page, select the agent you created.
- Click Create Alias.
- Enter an Alias name and Description.
- Click Create alias.
Test the Bedrock agent
To test the newly created agent, open it and use the playground on the right of the screen.This example uses a dataset of research papers as its source data. You can ask a question about those papers and get a detailed response, this time from the deployed version.